|
When it comes to the Nintendo 64 store kiosk carts, this is the big one. Welcome friend to Micro-64's giant article on the Turok 2 Not For Resale cart!
Turok: Dinosaur Hunter was one of the most successful 3rd party releases for the Nintendo 64. It was released in early 1997 to stellar reviews and strong sales. Critics were wowed as the game really showed off what the Nintendo 64 was capable of. A sequel to Turok: Dinosaur Hunter became inevitable. Strangely, Acclaim had announced they were planning Turok 2 before Dinosaur Hunter was even on store shelves.
Development was long for Turok 2 as it was Acclaim's most ambitious project they had ever done. The game they were developing just kept getting bigger and better as the price of cartridges went down. The ROM size was originally 8MB, but it eventually moved up to 12MB and then again to 32MB. Turok 2 was the second N64 cartridge to use a ROM size that big, and was also the second N64 title to make use of the new Expansion Pak. The original planned release date for Turok 2 was to be in October of 1998, or as Acclaim called it "TurOctober". This deadline was missed because the copy of Turok 2 that was sent to Nintendo for testing and approval was too buggy. The release date was pushed back to November 1998. Acclaim did manage to send a fixed version of the game to Nintendo in time, but the game was delayed and did not make its scheduled November release. Turok 2 was complete; this setback had been due to manufacturing delays. Turok 2's release date was moved to December and this time things were more successful. Turok 2 hit store shelves on December 10th 1998 in North America and on December 11th 1998 in the UK and Australia.
One interesting thing came about when Acclaim was marketing Turok 2. Acclaim produced their own Turok 2 Not For Resale carts to be used to demo Turok 2 in store kiosks. This was the first time a non-Nintendo/Rareware NFR was made. This was also the first and only time a Not For Resale cart was made in NTSC and PAL form; NFRs had always been NTSC only. This Turok 2 demo was used as early as October 1998 and in stores such as Toy's R' Us. Out of all the N64 NFR carts, the Turok 2 demo happens to be the most different from its final version. This cart features just the first level, and has tons of beta content.
Just like other Not For Resale carts, these games were supposed to either be thrown out, or returned to the developer when the store was done using it. I'm not sure which of these fates the Turok 2 NFRs were supposed to have, but the bottom line is some did not see this fate and have ended up in the hands of gamers. Micro-64 has managed to find a copy, and we'll tell you everything we've found.
Three quick things about this demo: You cannot save your game. The save points do not work and the game does not give you any information about your controller pak when you start the game. Second, this demo does not have a high resolution option. It plays in the standard resolution and makes no mention of the expansion pak if you have one. When I'm comparing screenshots, the final version will be in low resolution for a more accurate comparison. Lastly, the demo and final version have various degrees of borders. It changes so frequently that it's not going to be mentioned often.
Shall we begin?
Cartridge
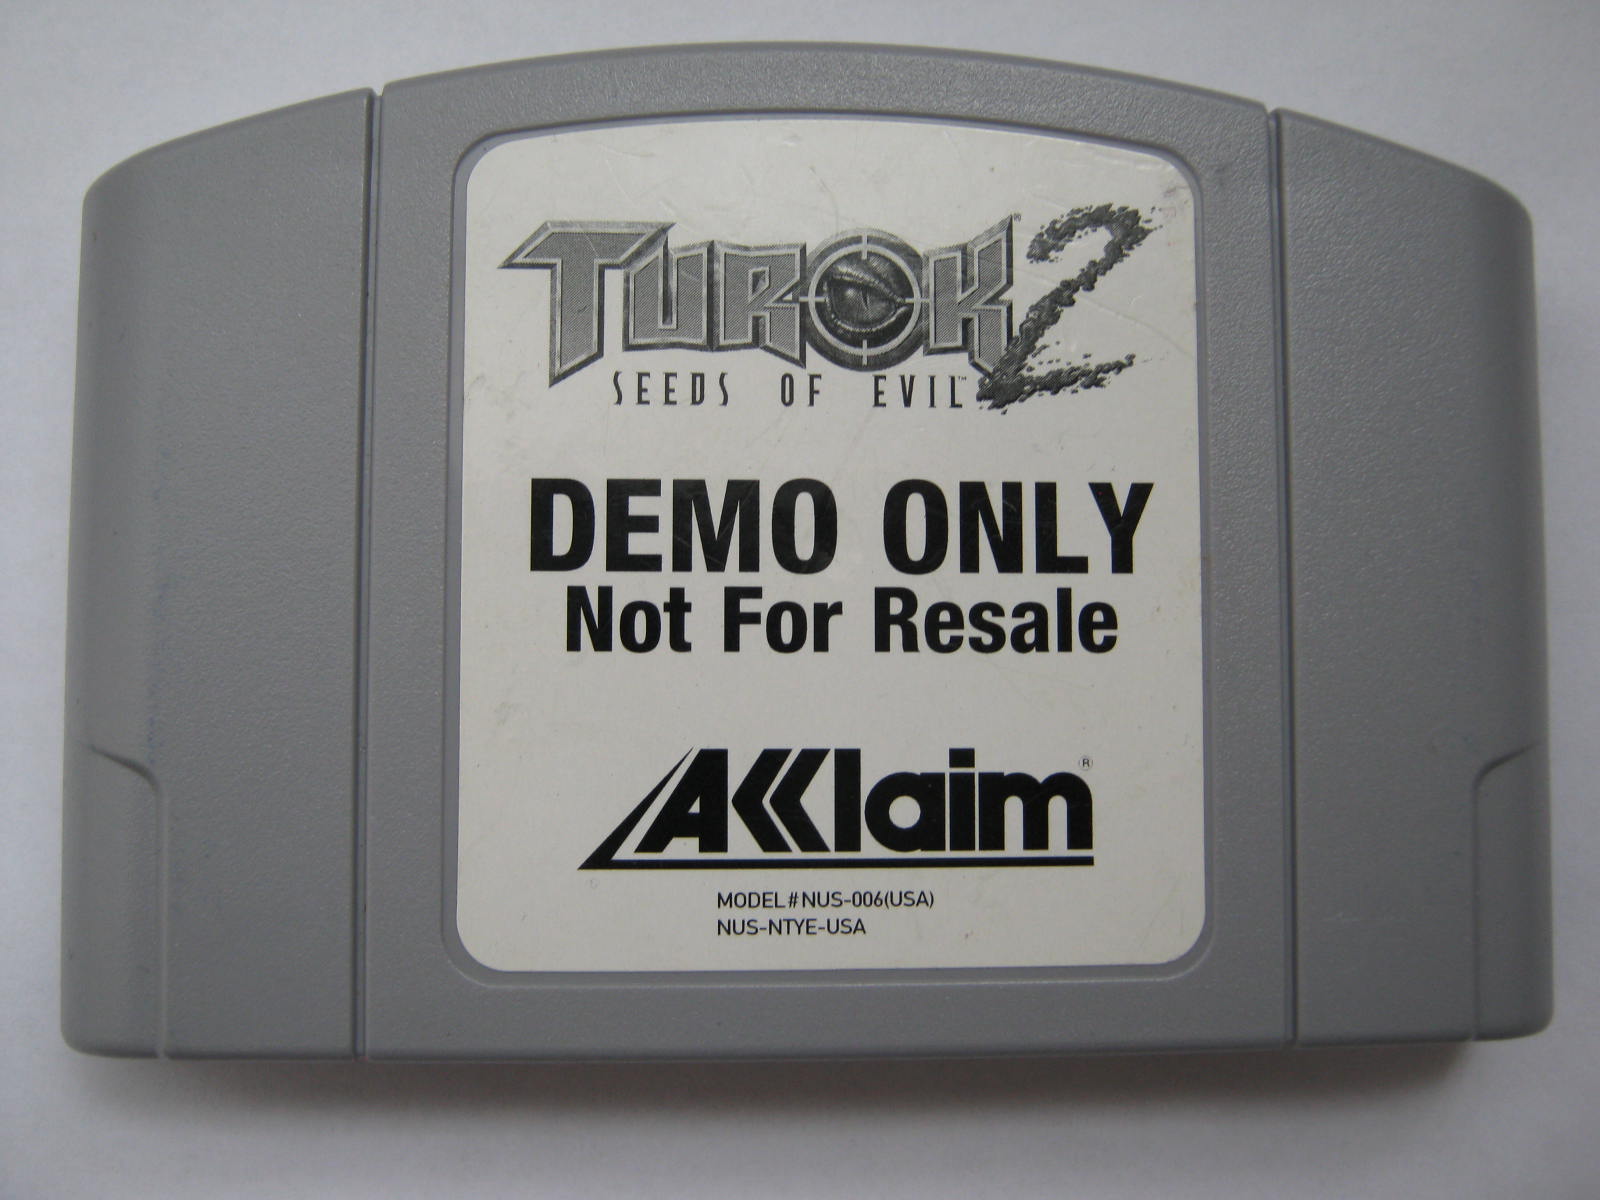
That's the Turok 2 Not For Resale cartridge, and its label looks nothing like the final version! The demo comes in a standard gray N64 cartridge, instead of black. The Turok 2 logo appears to be finalized, though in grayscale. The label lacks an ESRB rating, the Nintendo Seal of Quality, a Nintendo 64 stamp, and of course some colour. It has a large Acclaim logo that's impossible to miss, and a product code that's also a different.
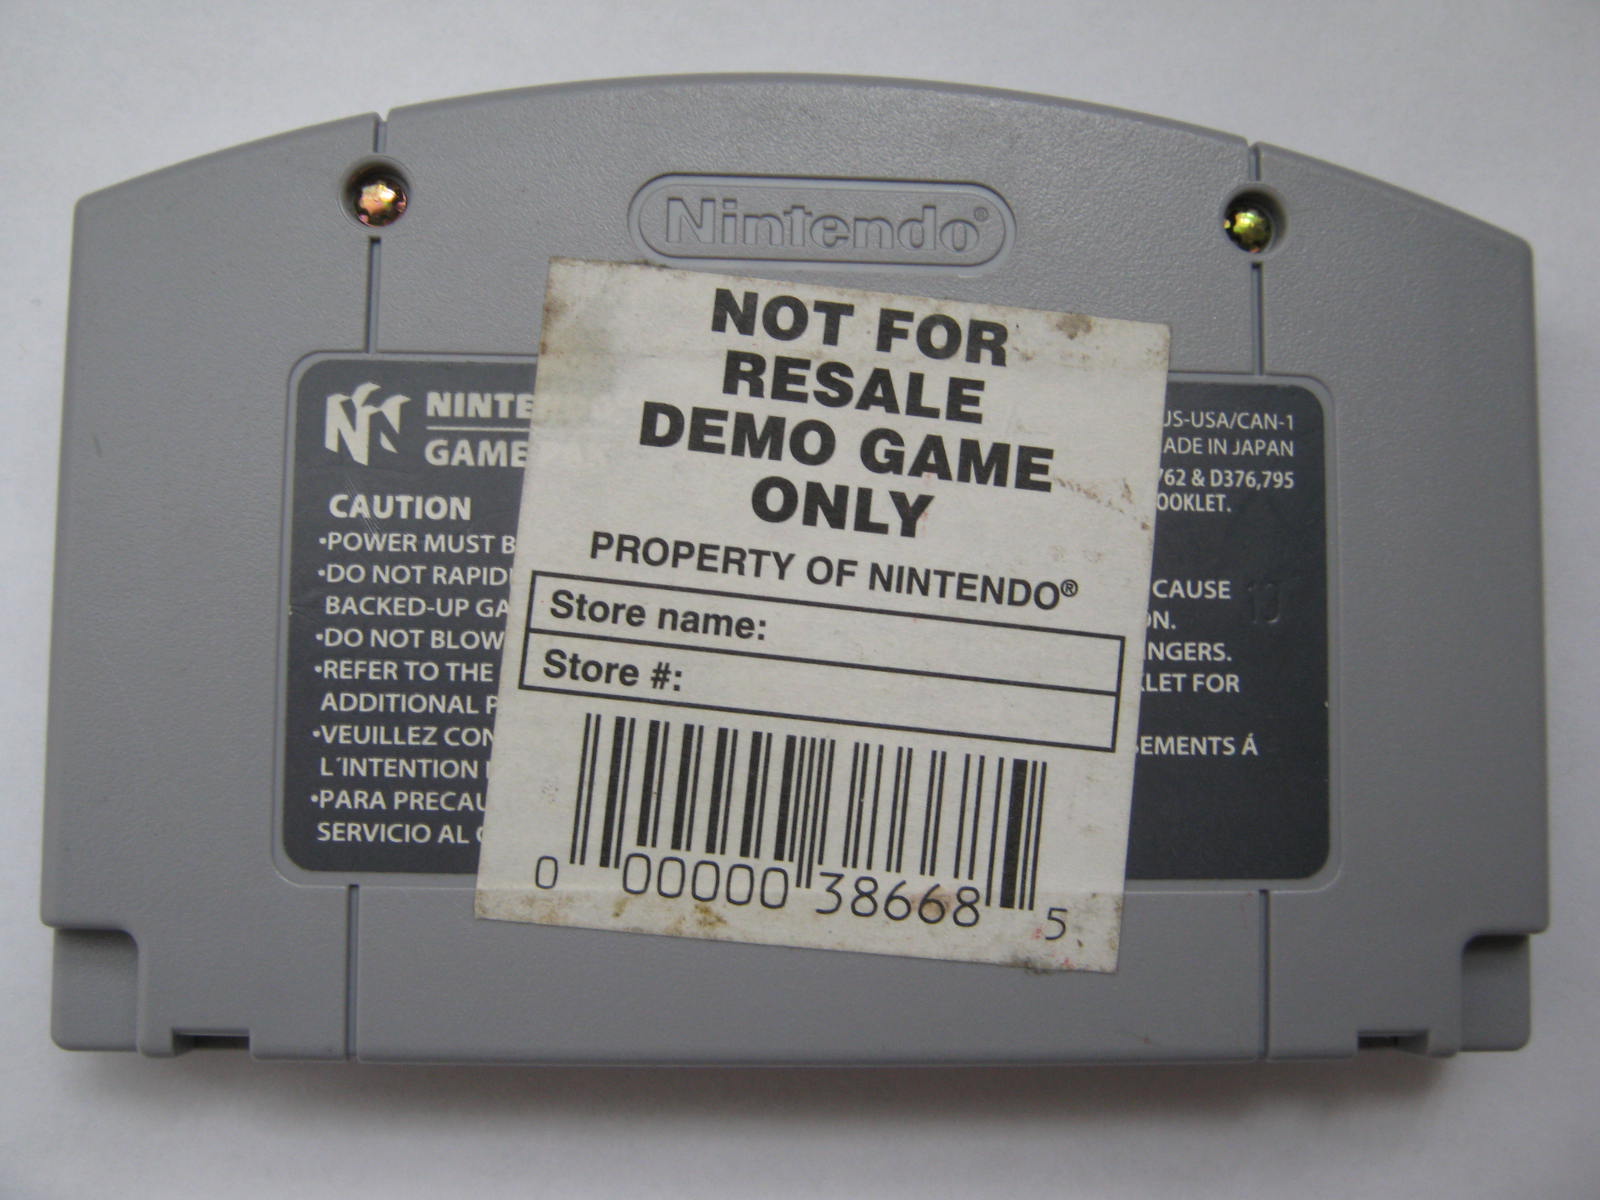
The back of the cartridge has the standard N64 cartridge label with a demo sticker on top. The store using this demo was to write their information there. Very few stores actually cared to fill this out.
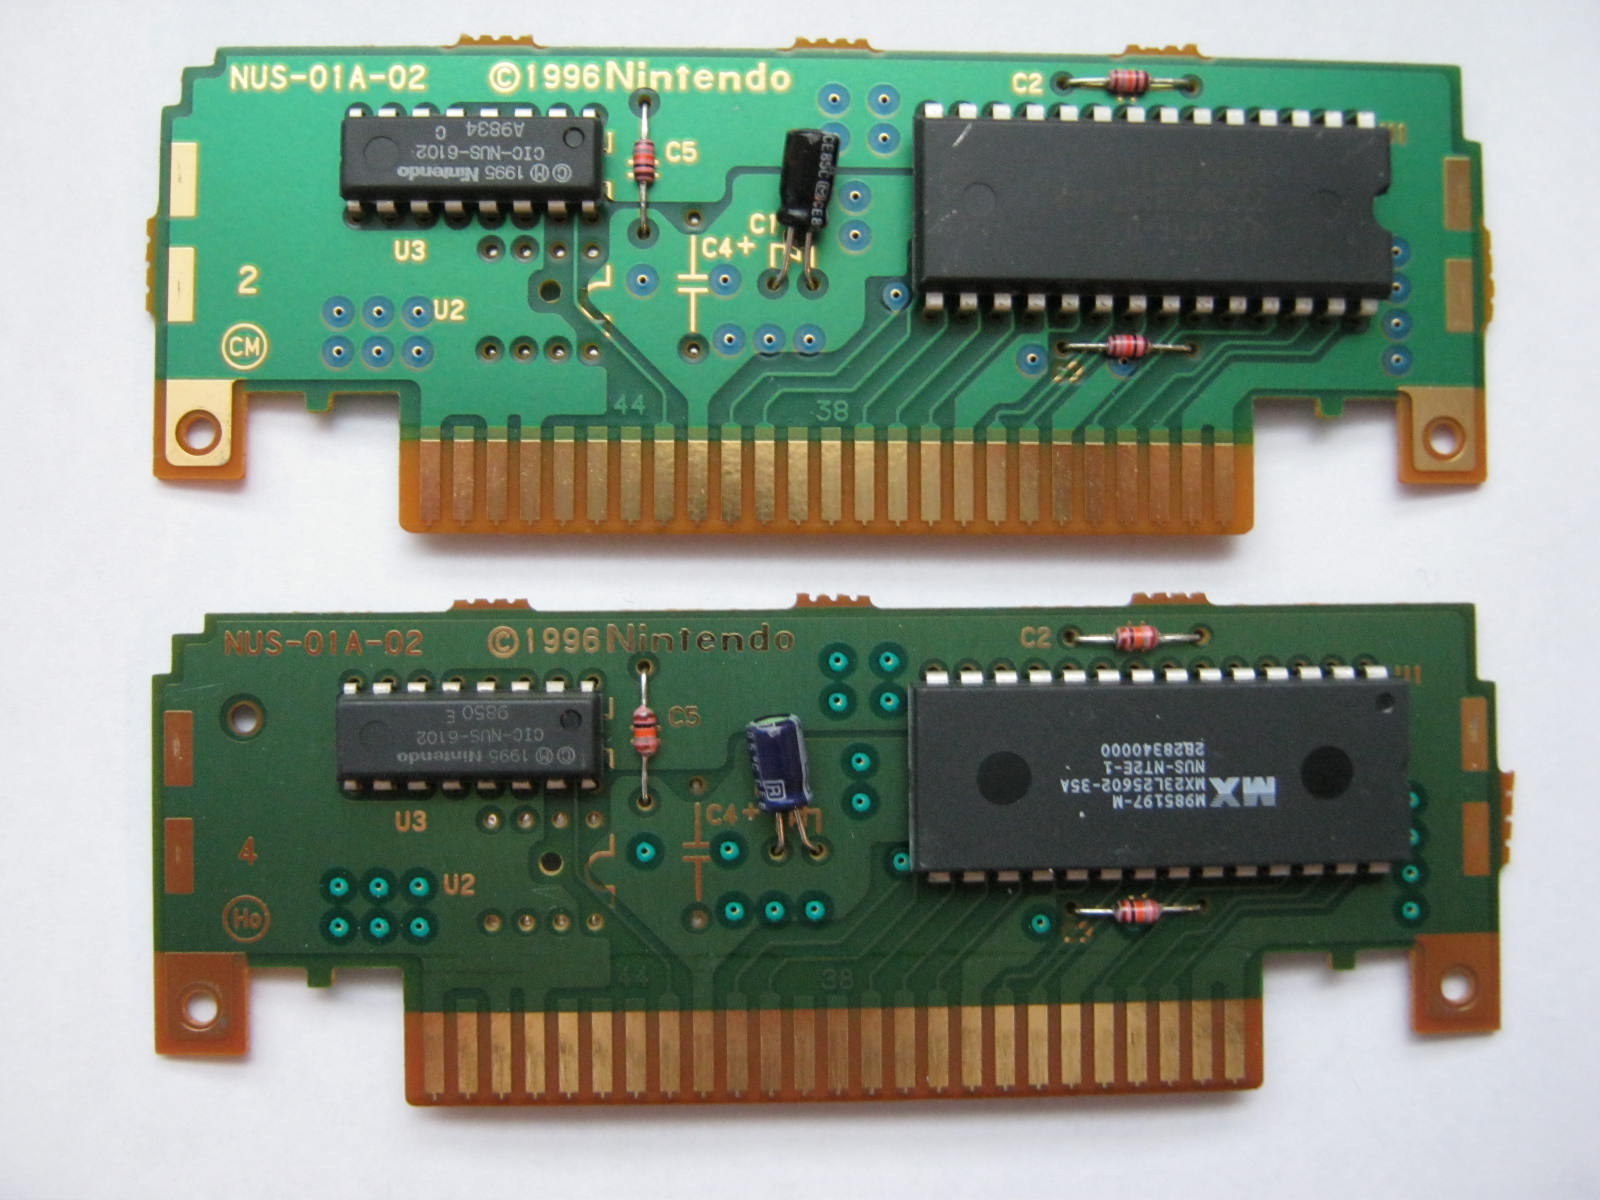
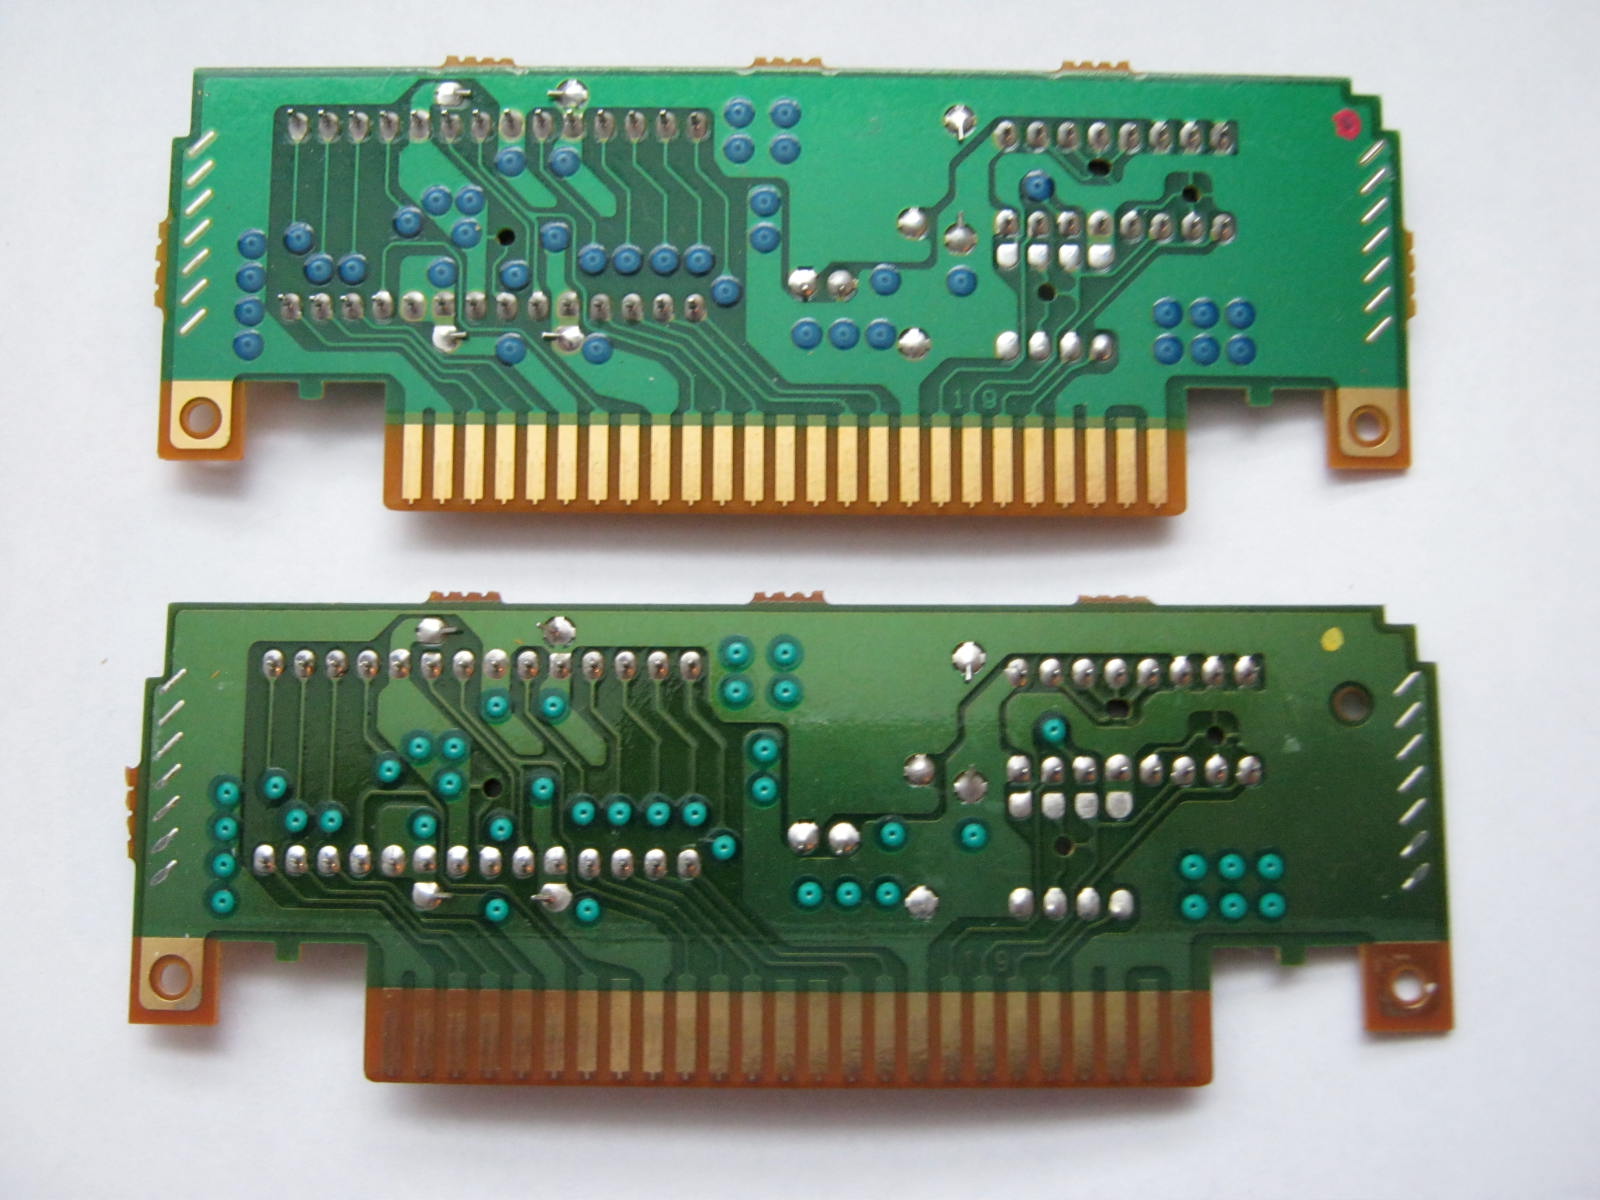
The top board is from the Turok 2 demo and the bottom board is from a final Turok 2 cartridge. The layout of the components appears to be the exact same, though the chips used are a bit different.
This is probably a good time to bring up the ROM sizes. The demo is 16MB and the final version is 32MB. Acclaim probably wanted to save some money when making these demo carts so they moved the game to a smaller cart size. One must wonder though, this was only the first level with no multiplayer. They probably could've put this demo onto an even smaller cartridge.
Startup
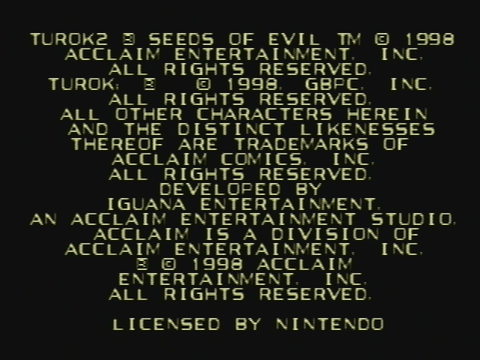
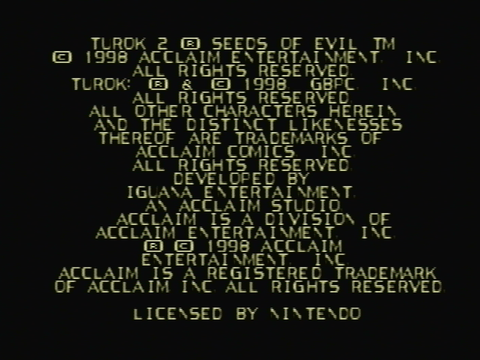
Demo left, final right.
If you exclude the final versions information about using a controller pak, then that copyright screen is the first thing you see in each game. The demo had some minor text errors and a bit of missing information. Everything was corrected for the final version. This screen is skippable in the demo, but not in the final version.

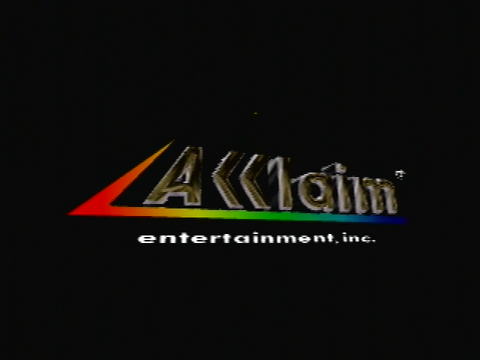
Demo left, final right.
Those two above screenshots are the very next thing you see after the copyright screen in each version. Besides that, they don't have anything to do with each other. The demo lists all the upcoming features as well as explaining that the demo has been censored. The demo actually is censored, more on that later. The screenshot on the right was the Acclaim logo that's seen in the final version. It's not in the demo and probably just wasn't finished yet.
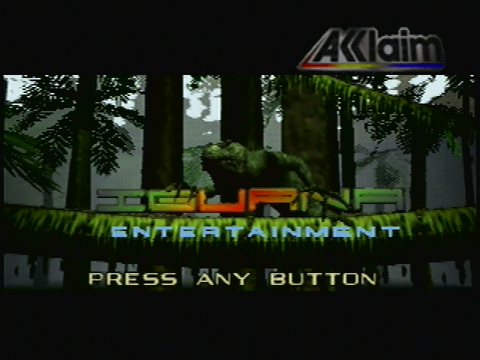

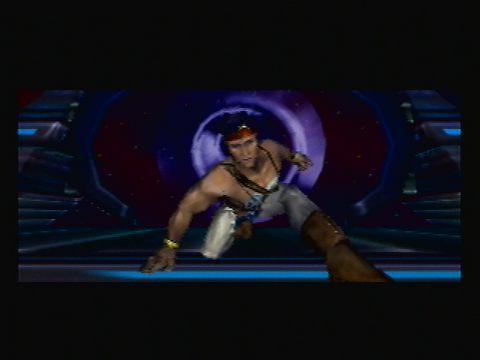
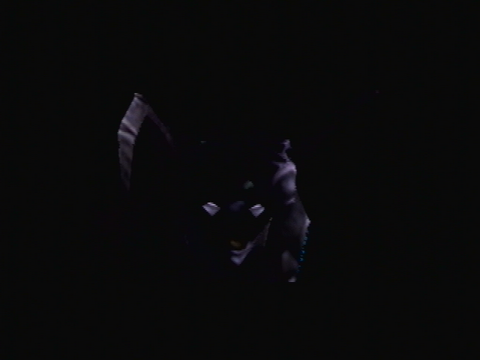
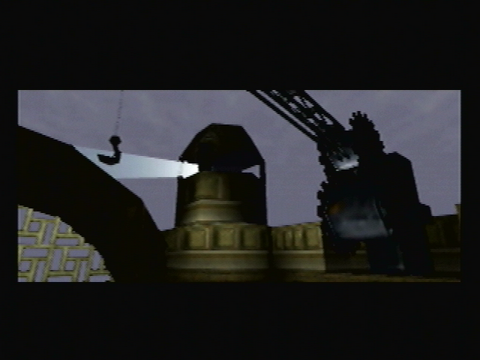
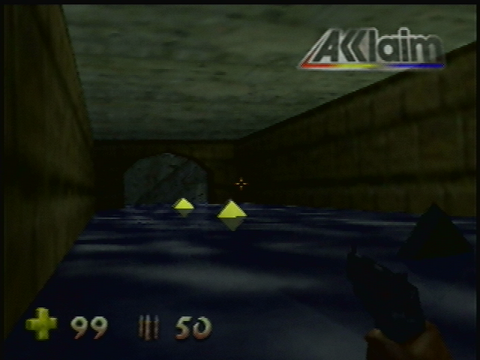
The very next thing that both versions go to is the Acclaim Iguana cutscene. You'll notice that there's now an Acclaim watermark in the top right corner. That logo is going to be there for the rest of the demo and it cannot be removed. This does help for this guide, as you'll always know which screenshot is from the demo and which is from the final version.
Now onto some changes: The Entertainment text is blue in the demo and one of the biggest trees there has moved over slightly. The amount of foliage appears to be the same but the demo has lots of fog. The demo has fewer arrows that hit the tree behind the Iguana and the Iguana has a different scream when he pops up with his guns. The volume is also noticeably quieter in the demo.
The Press Start text that you see is only in the demo. It carries on from this cutscene to the title screen.
Menus
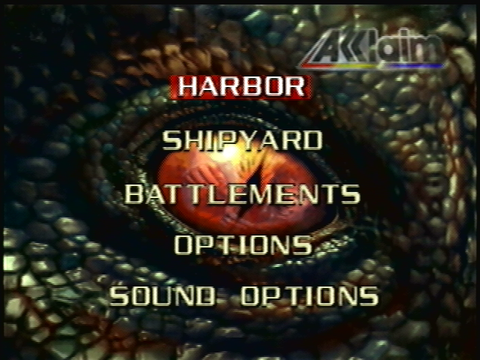
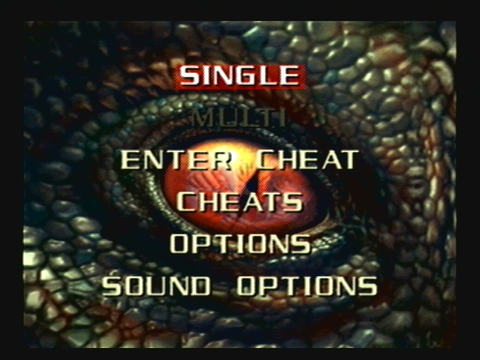
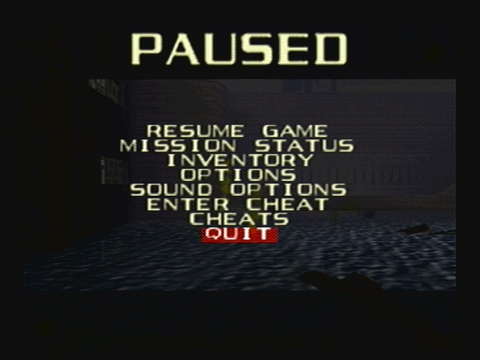
The title screens are the same in both versions, but the demo lacks music at the title screen as well as the menus. There's definite change to the above main select screen. The demo doesn't have the options for multiplayer or adding cheats. This demo is purely a one player game. There are no cheats or cheat codes, but you do start out with a lot of weapons. The first 3 things listed on the menu are all different spots in the first level that you can start at. Picking a save point will start the beginning cutscene, but after it ends you will start at the point you selected. Options and Sound Options have fewer choices.
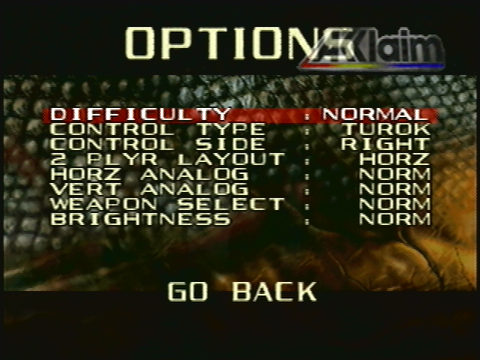
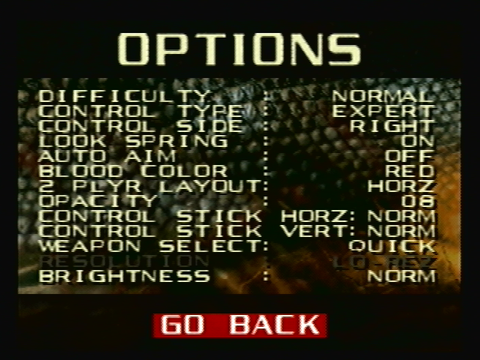
The Options text and Go Back text are a bit higher up in the demo. The demo also has several missing options including Look Spring, Auto Aim, Blood Color, Opacity, and Resolution. The missing resolution option makes sense as the demo may not have even had the higher resolution at that stage in development. The two Control Stick options were renamed for the final version.
The final version has two control types, Expert and Arcade. Expert is the same control layout as the first Turok game. The Arcade option was a control setup that mimicked GoldenEye's controls. Although Acclaim strongly believed that the Turok control layout was the best and most accurate way to play a FPS, they wanted to please everyone so a GoldenEye style control layout was added. These two control setups are the same in the demo, but the names are more obvious. The demo calls the control setups Turok and Golden.
Two of the options here are broken. If you try to change the Weapon Select, the demo will get stuck for a second and then reset. The demo has the weapon select defaulted to Normal, and the final version has the weapon select set to Quick. It doesn't matter how high or low you set the vertical analog sensitivity, it doesn't change at all in the demo.
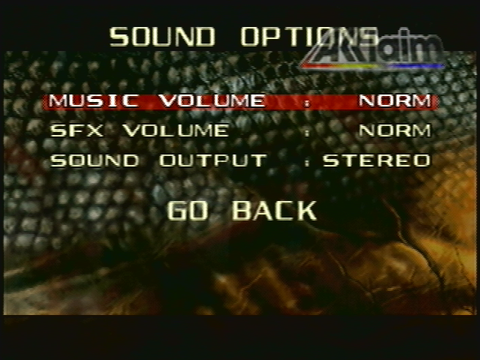
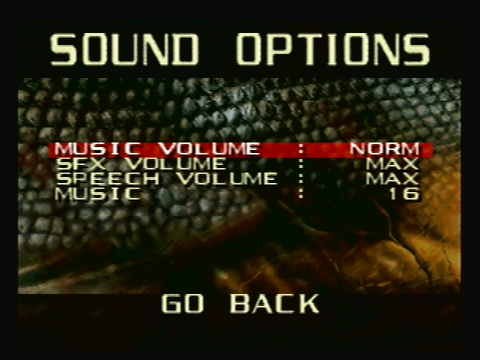
The sound effect played when selecting sound options on the title screen is broken and cuts out in the demo. The sound options menu has the text at the top and bottom in slightly different places. The demo also lacks a Speech option and a Music option. The music option was just a sound test. It was likely removed because Acclaim didn't want people hearing the entire soundtrack before release. Strangely, the demo has an option to select between stereo or mono. The final version doesn't give you a choice and you're stuck with stereo.
Both option screens also have some minor changes to the text. In the demo you can adjust the Music and SFX volume to anywhere from -16 to +15. The final version still does this, but -16 has been changed to Off and +15 has been changed to Max.
Opening Cutscene
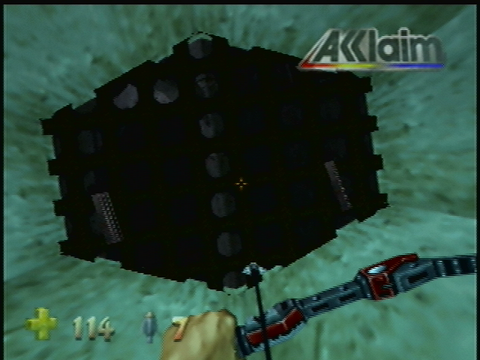
Once you pick a save point in the demo the game will start with the opening cutscene. It does not mention the memory pak like the final version does. There are some minor differences in this cutscene.

The demo actually allows you to skip the cutscene. As the cutscene starts, you may notice that the demo's background music is just a bit delayed. We can see that the portal that Turok jumps out of is much bigger in the demo, and when Turok comes out of it, the camera is more zoomed in on him. A very noticable improvement made was the voice clairty on Adon. It sounds much clearer in the final version. The story she tells is almost exactly the same. In the demo Turok must destroy 6 energy totems and in the final it's 5. That's an interesting change, sounds like there were more levels planned. A minor part of the cutscene is missing in the demo.
That bug is seen during the final versions cutscene. The demo just shows a black screen.
When Adon begins explaining the story behind the Port of Adia, the music resets instead of continuing like in the final version. We also see what was meant by censorship.
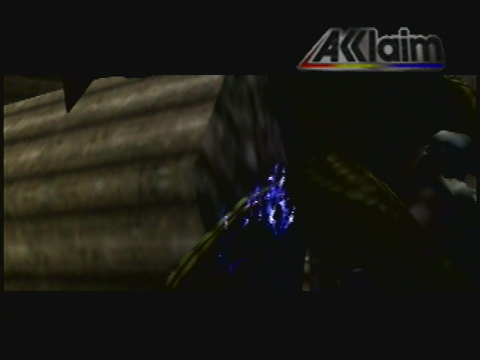
This game is missing all the blood and in most instances the blood was replaced by something else, as seen in the above picture.
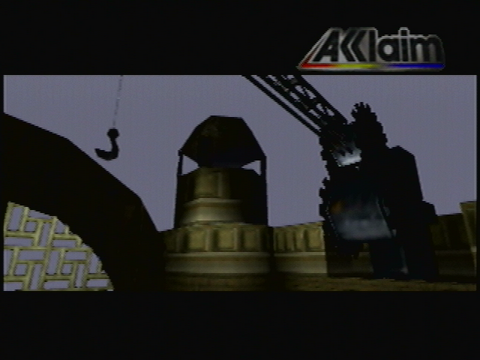
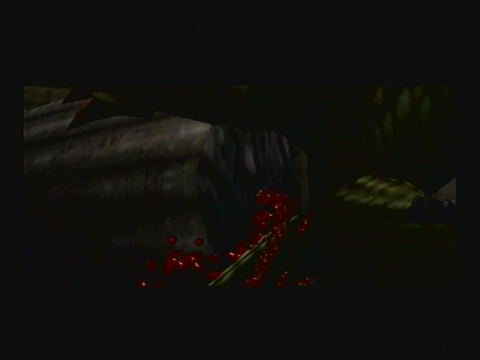
During the mission objectives, Adon explains that the distress beacons all need to be activated. The scene in the demo just shows a lighthouse but it actually turns on in the final version. The demo version doesn't have a single cloud in the sky and will not for the entire level.

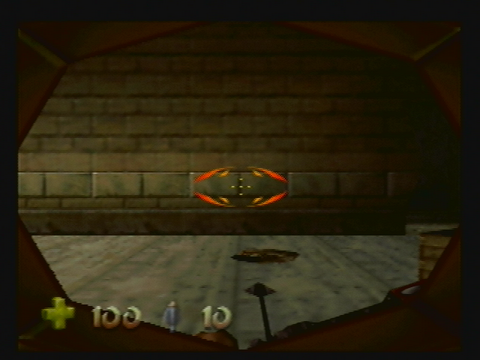
The last mission objective is to protect the energy totem. There appears to be more energy inside of it in the final version. There's also significantly more fog in the demo.
The cutscene ends after that and our game begins. In the demo Adon will say "3 Lives Remain" as if Turok just lost a life. This was removed for the final version as it was unnecessary. We can immediately see some level differences between versions, but we'll get to that in a bit.
Pause Screen
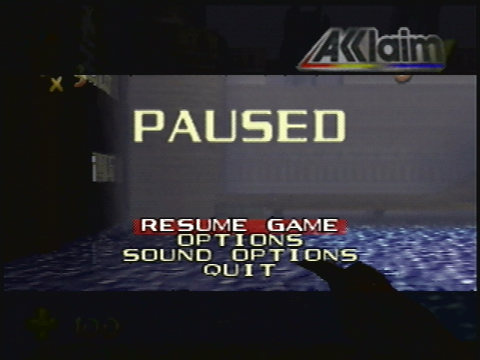
As expected the Pause Screen is a little more simplistic here. The screen doesn't dim when paused in the demo, the background music continues, and of course there are fewer choices. When you pick Options or Sound Options in the demo, you're taken to the exact same Options screens that you saw earlier. The final version just brings the text up on the same screen. Oddly enough, the Weapon Select choice in the options menu actually works here.
Normally when you pause the game the demo does not bring up your lives and amount of life force. It does in the above screenshot, but that's just because the demo does that when the game starts.
Weapon Overview
As mentioned earlier, both games have different default weapon choices. The demo version has Normal, and the final version has Quick. Normal is the choice that lets you flip through your weapons one at a time. Quick puts all your weapons on the screen at once and you just move the analog stick towards the weapon you want. These screens and the order/placement of weapons differ drastically between versions.
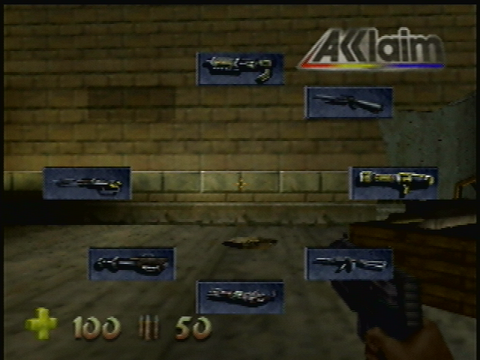
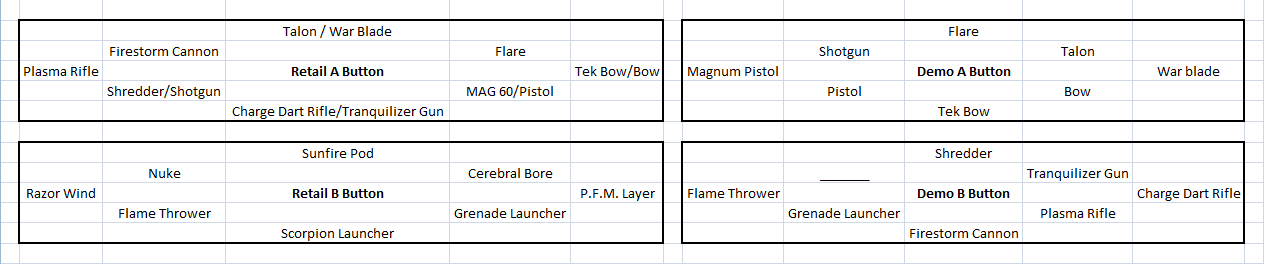
Quick Weapon Select while holding A
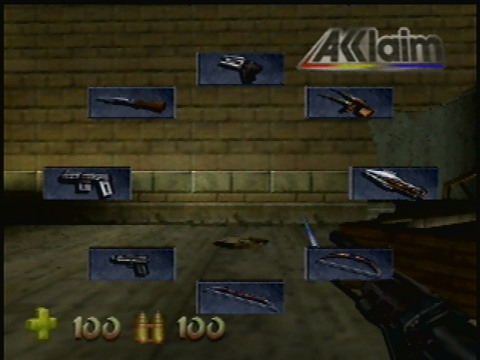
A very different look indeed. The demo version has all the weapons in boxes and they're much smaller. The weapon order is a bit different here. The final version had some similar weapons on the same spot and you had to hit that direction twice. The demo has enough room for every weapon.
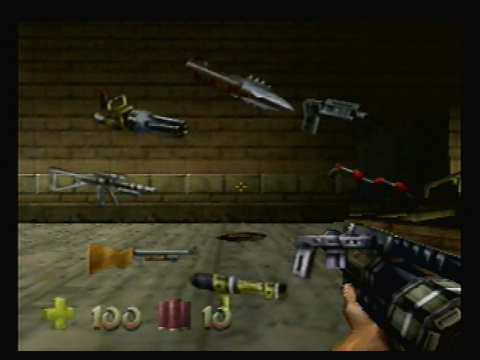
Quick Weapon Select while holding B
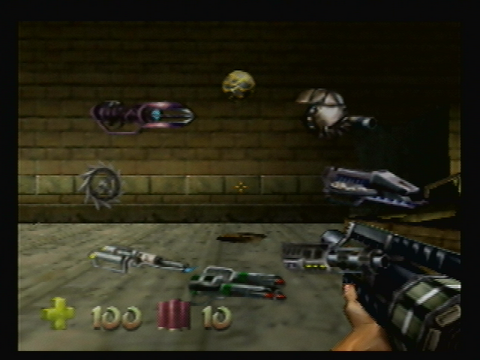
Some weapons have changed to the A screen, and vice versa. The Top Left spot in the demo is actually empty.
If you'd like to see the weapon placement changes by weapon name, click here to see a weapon map.
Normal Weapon Select

The demo weapons are in boxes here as well. The demo scrolls the weapons down and the final version scrolls them up. The final version had you hit left on the D-Pad to get to some alternate weapons but all weapons are there without having to do this in the demo.
Weapon Changes
Many weapons saw minor to major development changes between versions.
Flare
The Flare has a much slower recharge time in the demo that was sped up in the final version. It also appears to be a bit brighter particularly towards the center of it in the final version.
Talon/War Blade
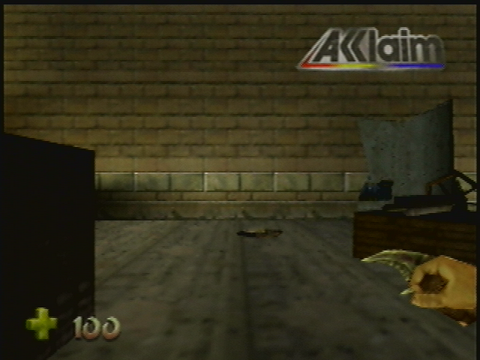
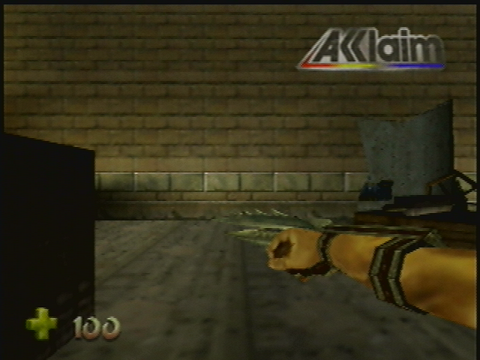
When using either of these weapons, Turok would claw back and forth. There were several different claw animations that went left or right, but the demo featured one more that was removed from the final version. This was a swipe that went forward. It was likely removed because it was slower than any of the other swipes.
Bow
The Bow went through several interesting changes. The demo's Bow could be pulled back faster and it also appears that you may have been able to scope in with it. In the final version, the Tek Bow can zoom in and snipe while the regular Bow can't. In the demo, pressing the snipe button when the Bow is out causes the screen to go glitchy for a second. It's likely that you could originally snipe with the Bow.
Tek Bow
There's also a few notable changes with the Tek Bow. You can zoom in and snipe with the Tek Bow in both versions, but the area around the zoom is brighter in the demo. The Tek Bow also allowed you to switch between normal arrows and Tek Arrows but in the demo you're mostly stuck with just Tek Arrows. The explosion from the Tek Arrows is slightly different between versions and, in the demo version, can actually damage Turok.
In the final version of Turok 2, you can use both normal arrows and Tek Arrows with the Tek Bow. In the demo, there's no way to switch between them when you want. You can however waste all your Tek Arrows and then the game will switch to normal arrows for you.
Mag 60
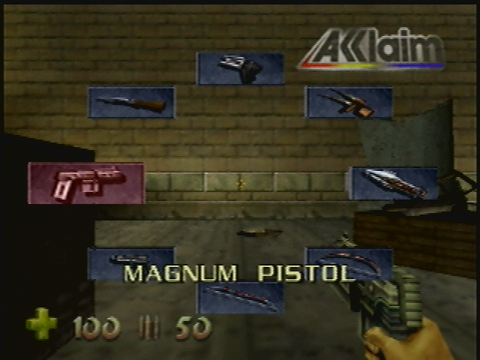

This weapon went through a name change and is known as the Magnum Pistol in the demo. The firing noise is the exact same, but it lacks an impact noise. An impact noise was added for the final version. The bullet holes you see when firing this weapon at walls are smaller in the final version.
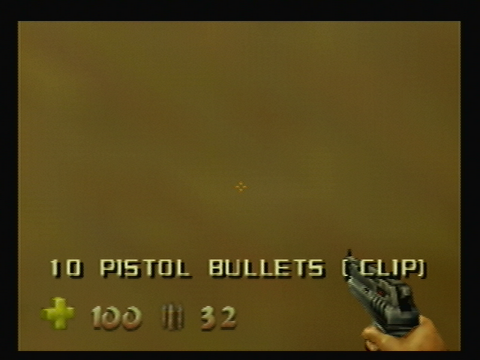
Pistol
The Pistol had two of the exact same changes as the Mag 60. It was given an impact sound for the final version, and the bullet holes on walls are now smaller.
Shredder
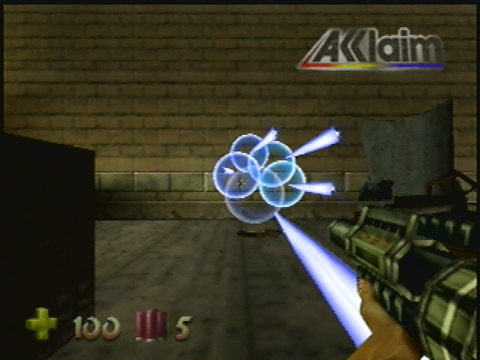
The Shredder underwent change because it really wasn't that useful in the demo. In the demo when you fired the Shredder once, 5 shots would come out, and if they hit any walls or objects they would bounce off in random directions. These shots would often miss enemies. The final version has a beam coming out of it that goes perfectly straight and is much easier to hit enemies with. If it hits a wall, it will bounce off at a straight angle.
Shotgun
The Shotgun suffers the same thing as the Shredder by having the bullet spread much larger. It's not as bad as the Shredder, but it's much harder to hit enemies from a distance.
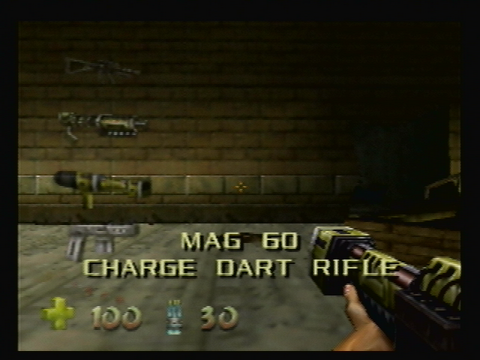
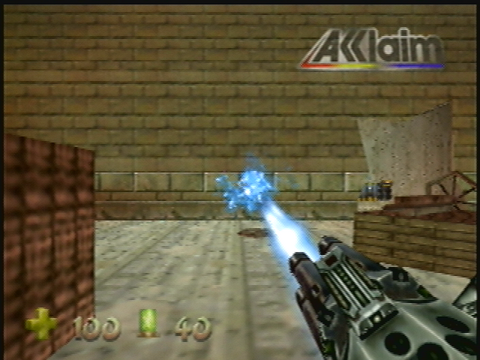
Charge Dart Rifle
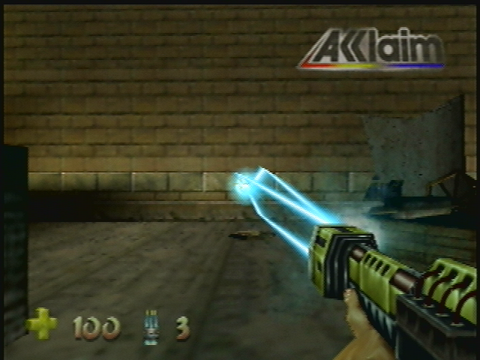

This weapon received some major changes. The electricity fired out of the gun is always blue in the demo and it always sounds the same. There's no impact sound and the gun always remains still when charging. The final version has the electricity in several different colours to indicate how much the weapon was charged. It also begins to shake when you start charging it.
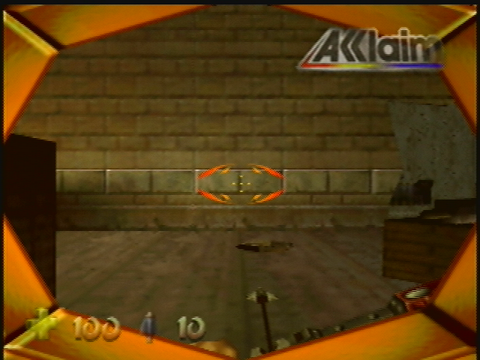
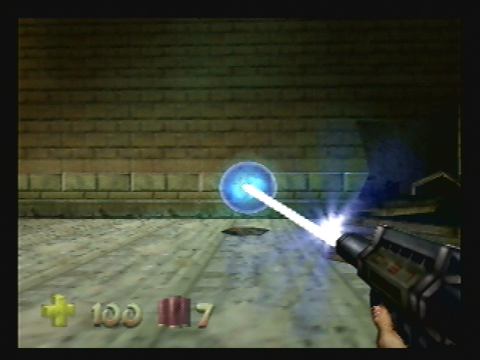
Plasma Rifle
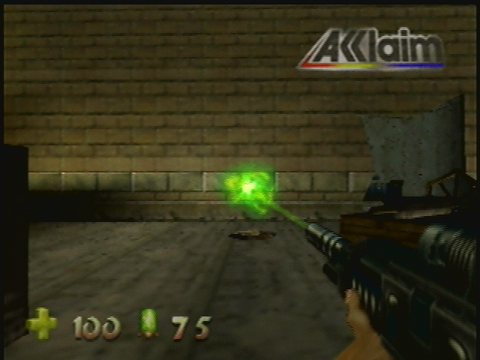
This is another weapon that's largely different. In the demo this weapon fired bombs that would stick to enemies. The bombs would take a second to explode. This changed when you scoped in as it would instead shoot a beam. The beam looked exactly like the bombs though. In the final version, this is a weapon that shoots a large beam and hurts enemies on impact. The shot is instant with no bombs whatsoever. Both versions allow you to zoom in with this weapon, but the demo has a brighter more detailed area around the zoom.
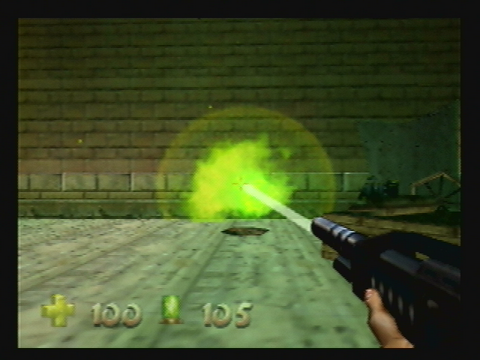
Firestorm Cannon
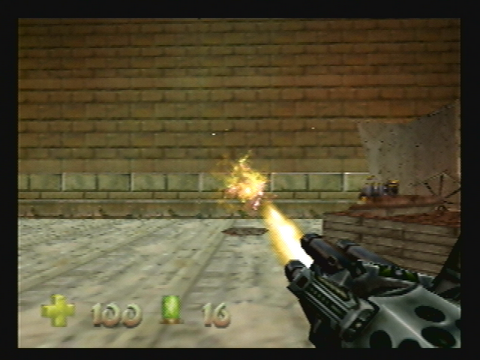
The muzzle flash for the Firestorm Cannon was blue in the demo but was changed to yellow for the final release. The sound of the weapon turning also differs slightly.
Grenade Launcher
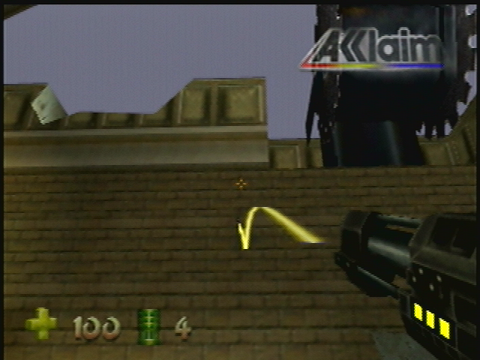
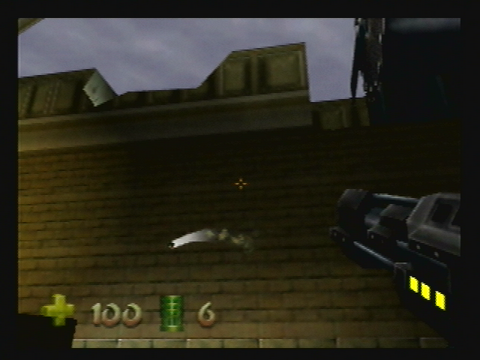
The Grenade Launcher appears to be the same, but the grenades it fires out have a long yellow trail that follows them. This is a clear, much shorter trail in the final version.
Reticule Change
The final game's aiming reticule is just a bit bolder compared to the demo.
Ammo Changes
Some weapons had their maximum amounts of ammo changed. Those weapons are:
Shotgun/Shredder Explosive Shells: 20 max in demo, 10 max in final.
Tranquilizer Gun: 20 max in demo, 15 max in final.
Flame Thrower: 100 max in demo, 50 max in final.
Misc
Several weapons including the Nuke gun are absent in the demo. The Nuke gun was the big weapon, just like the Chronoscepter from the first game. The demo does happen to have one empty space for a weapon. It's likely that's where the Nuke went, and it was left out of the demo to avoid spoiling anything. The other weapons missing in the demo are the Sunfire Pods, Cerebral Bore, PFM Layer, Scorpion Launcher, and Razor Wind. These missing weapons are the more "gimmicky" weapons of Turok 2. They likely hadn't been made yet.
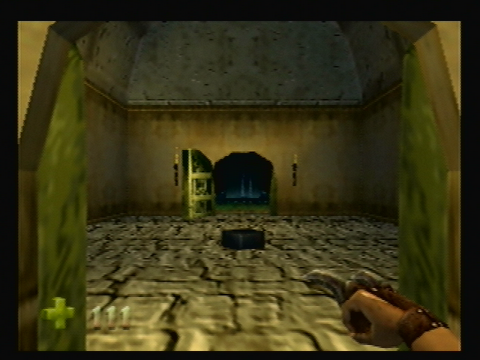
The Game Begins!
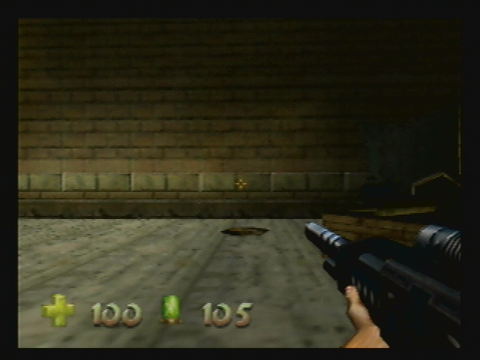
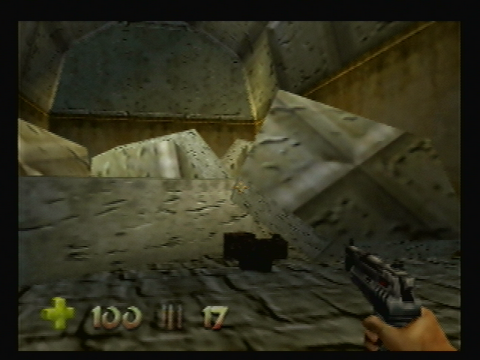
Alright so enough delaying. Welcome to level one: The Port of Adia. The beta version that is. This level has a lot placement changes. Lots of pick-ups are gone or have been replaced by something else. The actual layout of the level is mostly the same, but there are a few structral changes as well. If you're playing the demo, then you'll start with all of the above weapons. I'll be doing a walkthrough of the entire first level and pointing out all the changes. We begin the level on the docks.
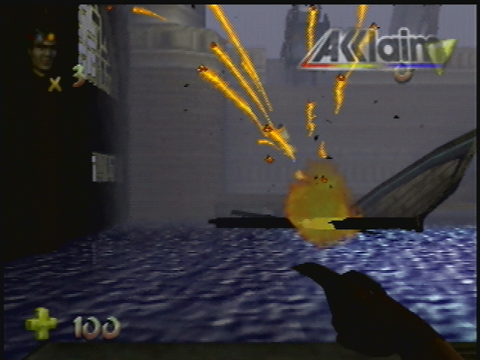
Once you start the game, you immediately see a boat explode right in front of you. It goes down the same way in both versions and breaks into the same amount of pieces. The actual explosion is different and has more objects flying out in the demo. When you head up to the top of the dock you'll immediately notice some changes with the fire.
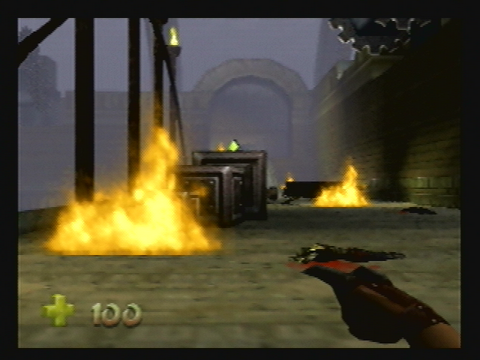
Each fire is the exact same in the final version. That very first fire in the demo is small and is only yellow. The rest of the fires are the same as final only being much more red-orangish. The two dead soldiers are absent in the demo for censorship reasons.
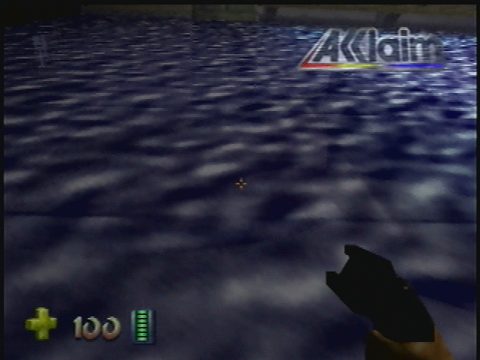
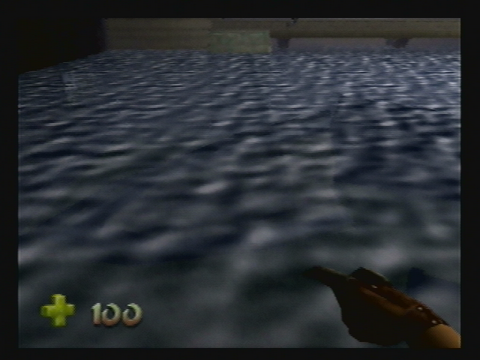
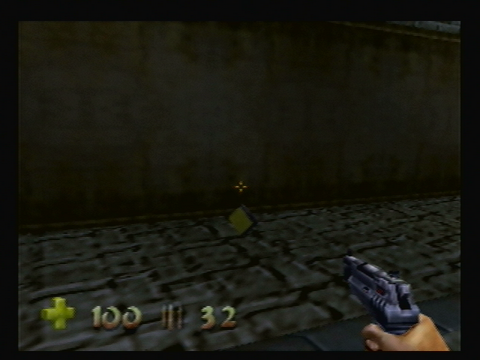
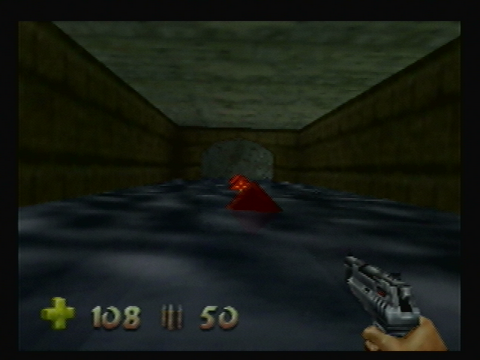
The water appears to have the exact same texture, but the colour is a bit more bluish and unrealistic looking in the demo. If you dive down you'll notice some placement changes with life force. The final version features one red life force diamond at the bottom of each of the 5 aqueducts. The demo only has life force in the very last aqueduct, and it's 4 gold ones and one red one. The two big pieces of the boat each have life force inside them. The piece of the boat that's closest to your starting point has 2 gold life force and 1 red life force inside it. That's in both versions. The other boat piece has that exact same amount in the demo, but 3 red life force in the final version.
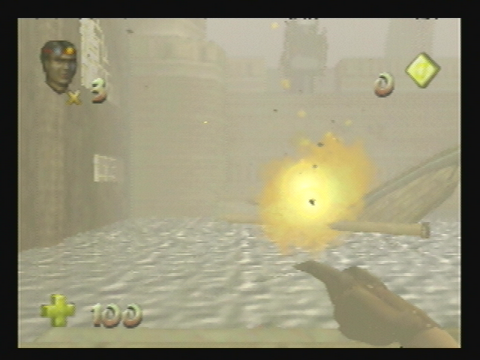
The lighting and fog are very different between versions and it's like that throughout the entire demo. The demo will often be brighter and have more fog. These changes are so frequent throughout the level that they won't be talked about in less there's something interesting to point out about them.
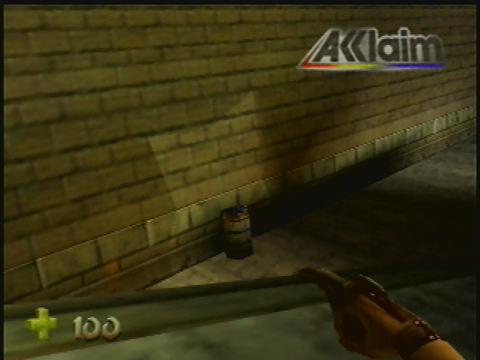

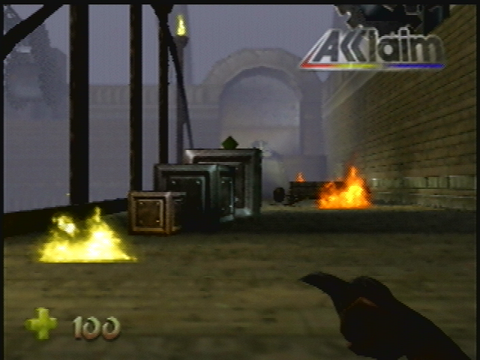
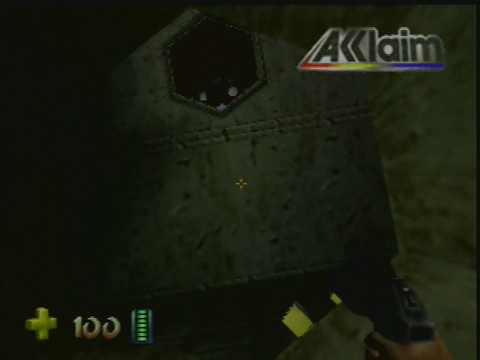
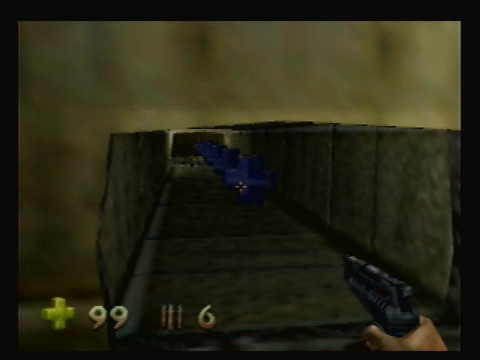
There is some notable lighting that's worth mentioning here. When you get to the very first barrel you'll notice something strange going on with the wall. The lighting is acting very glitchy and keeps flickering. This makes it easy to see what part of the wall will be gone when you shoot the barrel. I'm not exactly sure what's causing this, but my guess is that it's caused by the lighting from the nearby fire, and that lighting changes from fire had not been implemented very well in the demo.
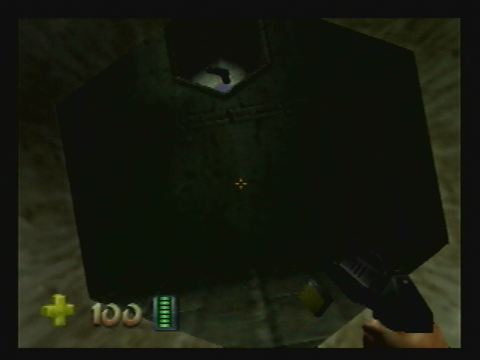
Once the barrel is gone, you'll climb up a ladder to a different room. Looking up in the next room, you'll see a Pistol in the final version, and a grate with a Power Cell behind it in the demo.
Both versions will have 4 gold life force that lead to the next room, which is to the right. In the final version there's a Power Cell here. The demo has nothing.
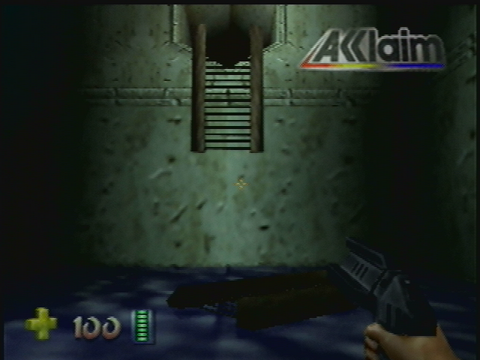
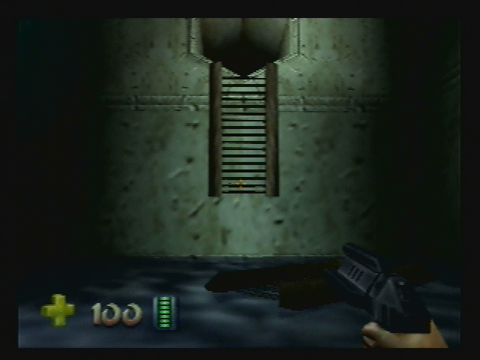
You'll continue on to the next and final room of this particular area. This room has a teleporter in it and a broken ladder. The part of the ladder that you can climb is longer in the final version. This is good as Acclaim made it easier to reach it, but the broken piece on the ground was not changed to be smaller so it doesn't make much sense. Jumping up there will let you access the items mentioned earlier.
In the demo there's a Power Cell there, and in the final version there's a Pistol. In the demo you would have to go up here as you need to get the Power Cell to move on. In the final version you would already have the Power Cell and getting the Pistol is helpful but not necessary. This means that going up that ladder went from being required to optional. Once you have acquired the Power Cell, you have to take it back outside to the starting area as that's where the spot for it is. In the final version you can just jump down from where the Pistol is and that'll save you some time. The demo has a grate in the way, so you have to go back the exact way you came.
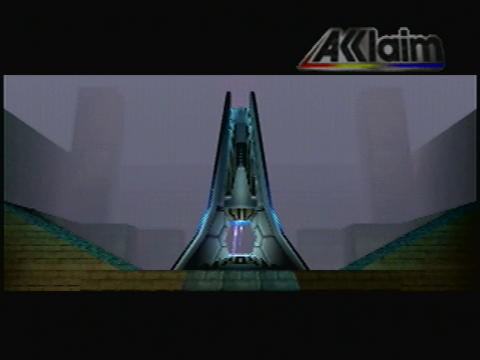
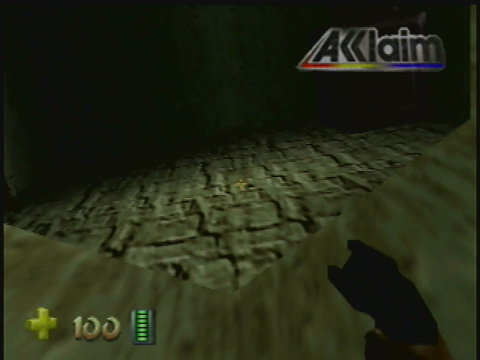
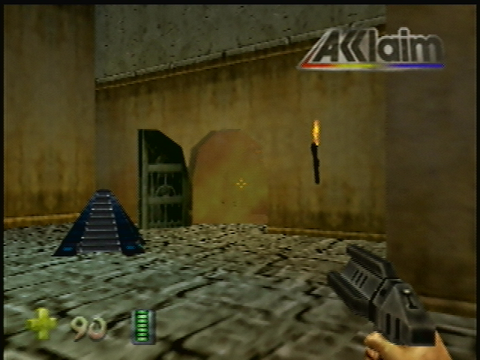
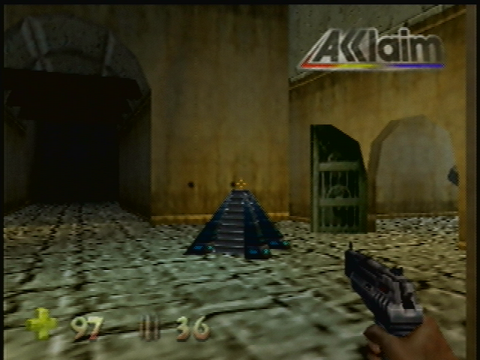
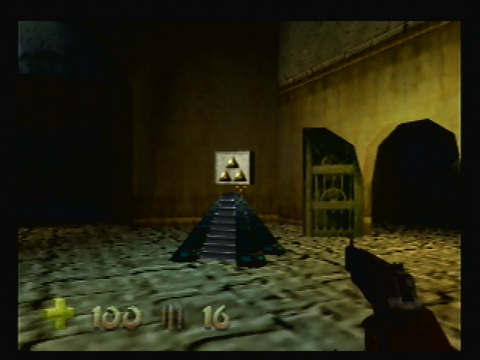
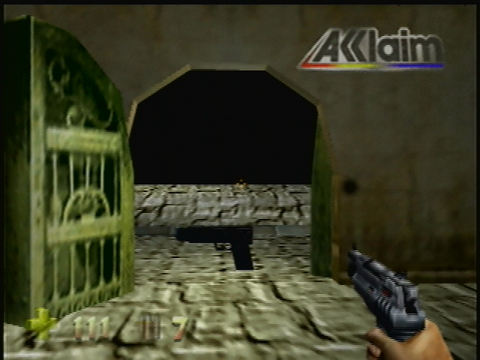
Placing the power cell back in its spot causes the lighthouses to turn on. Just like the opening cutscene, the demo doesn't have a cloud in the sky. We have now done everything in this area and can take the teleporter to the next part of the level. This is a good time to point out the different teleporter look.
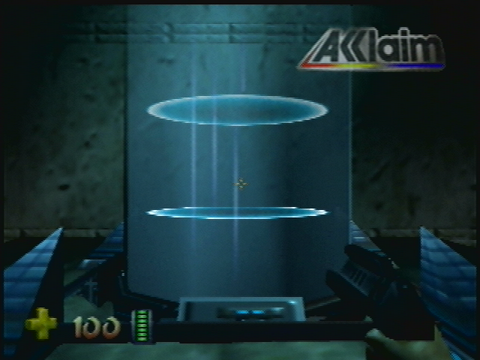
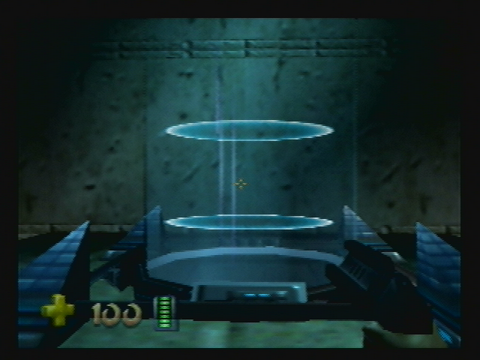
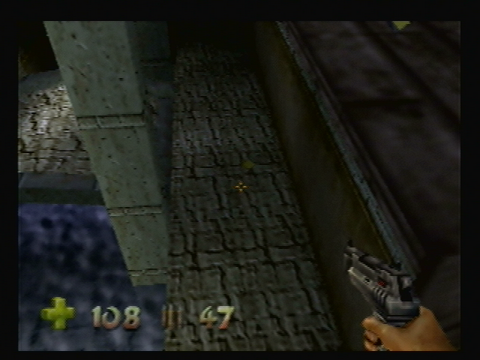
All the teleporters in the level look like that. If you've collected all the life force up to this point then you'll have 97 in the final and 43 in the demo. Enter that teleporter.
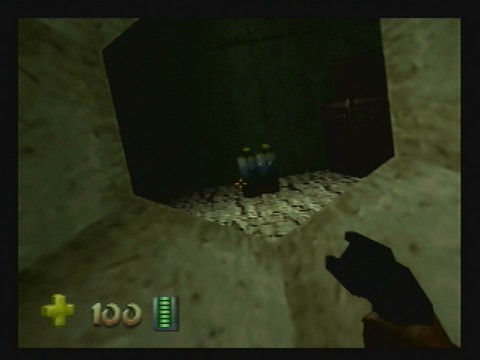
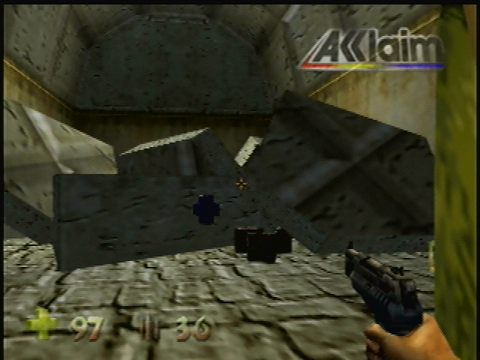
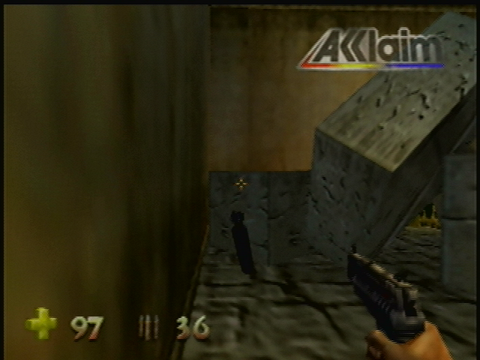
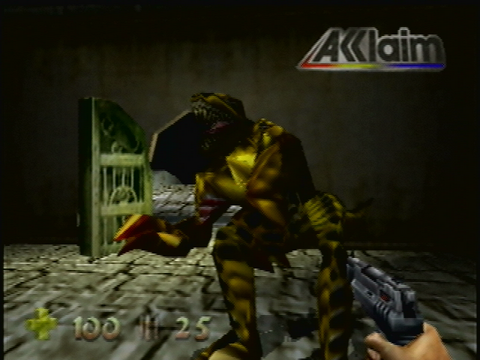
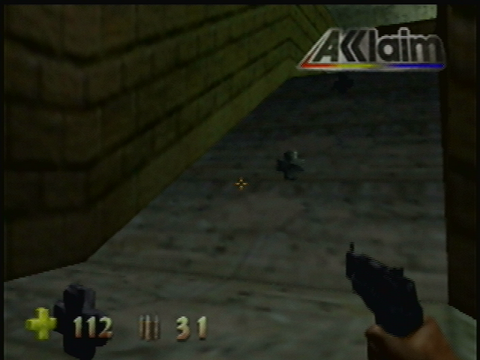
That teleporter will take you to a large rectangular-shaped room. There's a ladder leading to some life force up top, but otherwise you need to take a left to continue. You'll see your first enemy here, but he goes down easy. Due to the demo's censorship, there'll be no blood when killing him. Head on further into the room and you'll see few explosions in the demo.
There will be 2-3 demo-exclusive explosions coming from that room to the right. These explosions were likely removed for the final version because it was too easy to get hit by them. I also say 2-3 explosions because the third one seems to only sometimes. There's a few pick-up differences here.
The demo has no keys to collect so all pedestals will be empty throughout the level.
The demo has 10 health there. No pick-ups are in that room in the final version.
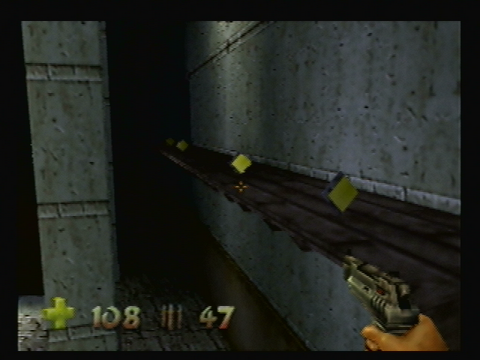
A quiver of arrows has changed places slightly between versions.
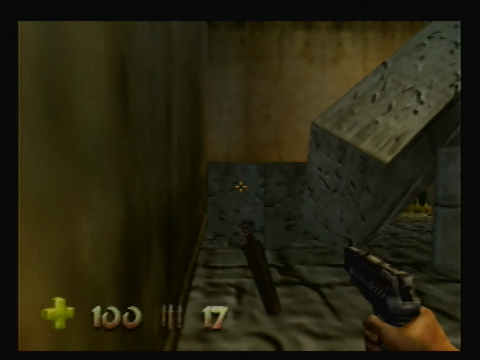
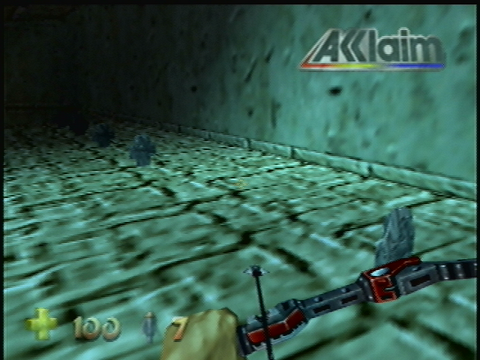
As we continue on, we'll have two enemies jump out at us. They go down easy with the Talon. The next room is also rectangular and has a ladder leading up to some life force. There'll be a barrel to shoot and a small tunnel to crawl through.
There's 6 health pick-ups here. These are each worth 2 health in the demo, and 10 health in the final. The 2 health is more useful at this point in the game, as you can't pick up the 10 health, but the 10 health is more useful later, as you might be back for it after completing a harder level.
After that little health tunnel you'll be here. This is the same room that had that single 10 health in the demo, you're on the opposite side now. One thing worth mentioning is that this is the first Pistol you'll get in the demo. That makes the demo much harder as you would've had to defeat 3 enemies without it. Both versions have the Pistol there, but as soon step into the next room, you'll be attacked by an extra enemy that's only in the demo.
You'll be entering a rather large room with a pool in the center. There's an enemy up top that you need to shoot down. The wall behind him opens up when you kill him. There's a few things worth mentioning in this room that are in the final version.
You'll be entering that closed room later, as the switch for the door is just upstairs. Both versions have two clips of ammo right on the otherside of the wall. What's odd here is in the final version you can collect these clips of ammo through the wall! This glitch doesn't work in the demo. Acclaim must've made it so that you can collect things without having to be as close or something as the clips of ammo are in the exact same spot in both versions.
The other thing worth mentioning is that there's one life force in this part of the room. Only one, and it's just in the final version. It's in the most random spot too. Why is it here you ask? You'll find out in a moment.
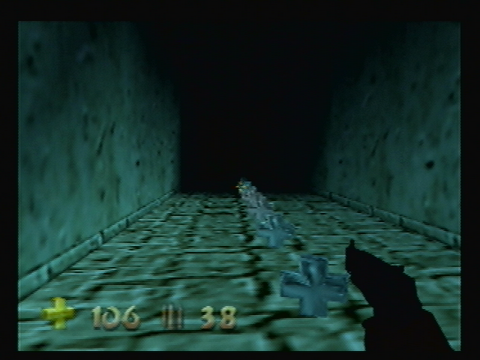
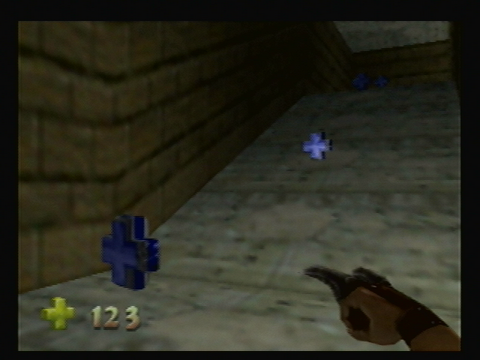
To continue on you need to jump in the pool. There's some health and ammo in the center. Carry on through the little tunnel and collect the different life force. The final version has 3 red ones, while the demo has 3 gold ones.
Once you get through the little tunnel, you'll enter a room with a ladder and switch. Activate the switch and a wall will open. Kill the enemy there, collect the health if you need it, and head up the ladder to the top part. There's some life force to collect here.
Take a look at that left screenshot. It's a bit hard to see but that's the single life force from earlier. Now to your right there's 4 life force to collect here. Now strangely enough, there's an empty space half way between life force, almost like they intended to put 5 of them here. If you line up the single life force on the ground, then you'll see it was supposed to be up here.
You'd expect the demo to have an error like this, but no the demo has all 5 life force up top. Acclaim, how did you manage to screw this up?
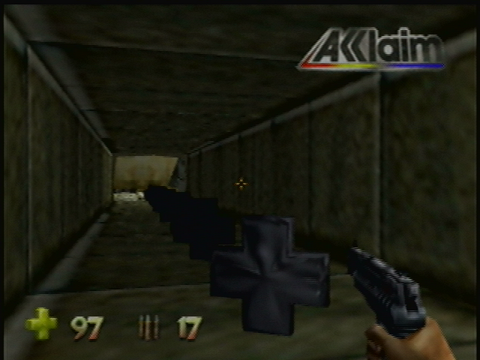
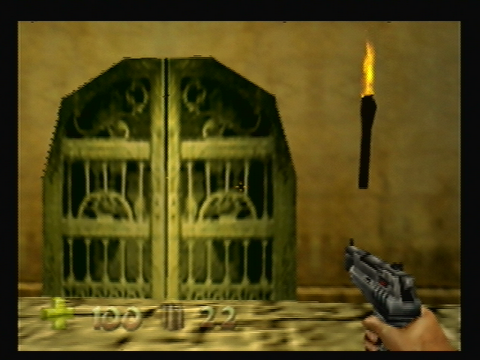
Collect the life force up top and carry on around the side until you reach a ladder. Climb up and collect the flashlight. Climb up another small ladder and there will be a health difference here.
There's 8 2 Health pick-ups here and 7 of them in the demo. The demo has an empty space for one though. Maybe one fell through the ground while Acclaim was placing them? Carry on and you'll enter a room with a little tunnel and a switch.

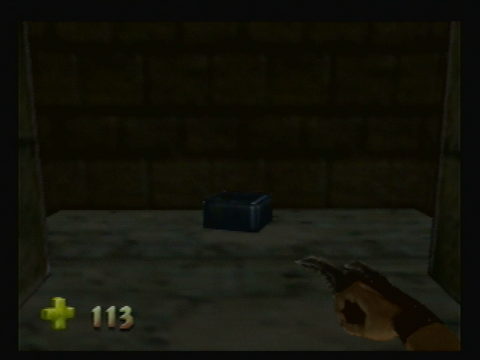
The tunnel has different pick-ups at the end. 20 Pistol bullets in the demo, and 10 life force in the final version. Leave this tunnel and hit the switch. A wall will open up. Carry on through and you'll enter the room with the first child.
Kill the enemy here and head across the room as there's a way up. There's another minor health difference here.
There's 2 Health pick-ups in demo. These were changed to 10 health for the final version. It's like this on both sides.
The enemy up here will need to die. Once dead, a door will open revealing a switch. Hit that switch and the childs cage will open, as well as the door across from you with an enemy. Kill that enemy, and pick up the different ammo there.
The demo was kind enough to give you some arrows here. These were removed in the final version.
Also there's some extra gangplanks to the child's cage.
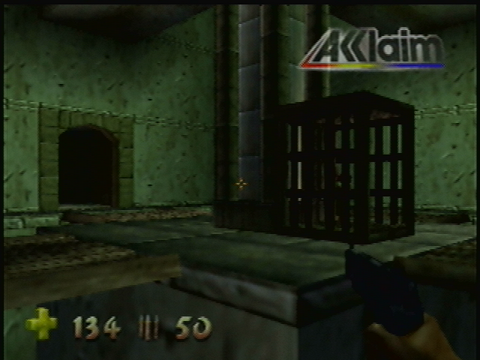
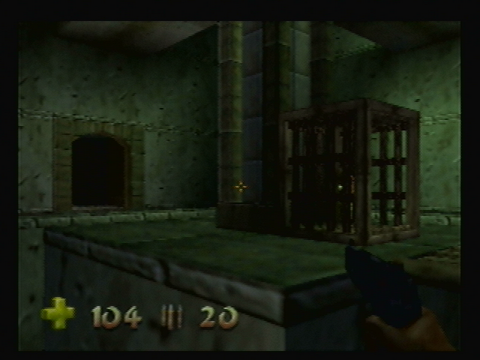
The demo had four bridges while the final version went down to just the one that leads to the front of the cage.
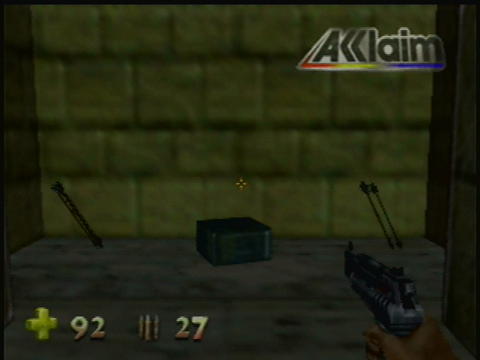
There's not a whole lot left to do. Free the child, and go back the way you came, all the way to the big room. Hit the last switch and the door below will open. Kill the enemy that walks out and enter the room.
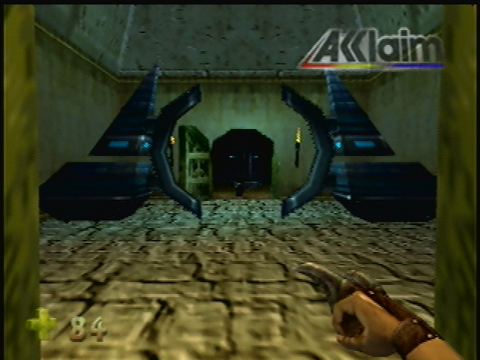
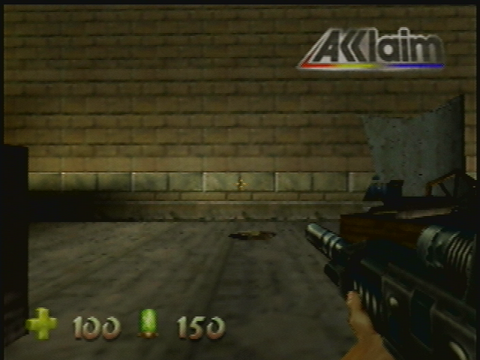
The demo will have a large Check Point here. It works exactly like the ones in the first Turok game and the game will say "Check Point" when you walk through it. The demo has given you another Pistol here. That's strange because the way the first Pistol was placed, it was impossible to walk into that room without collecting it. The final version has given you a box of bullets which is much more useful.
You can see the teleporter straight ahead. Kill the two enemies in that room, collect any arrows and Pistol bullets if you need them, and walk through that teleporter to the next area. If you've collected all the life force so far, you'll have 153 in the final version and 62 in the demo.
We're only just getting started in this demo!
Click here to go to page 2!
Written by Kevin Ames
April 6 2013
|
